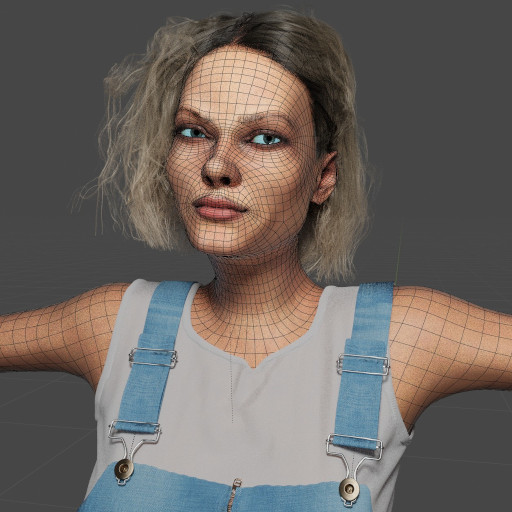
Here is the situation:
- On the left I have a monkey (Blender's Suzanne
default shape) where I first created two shape keys: one
to lift the left eye brow and one for the right brow. Then
I added a third shape key which makes the chin wider. This
works as it should be.
- On the right side is what happened in my real model: The
wider chin is already included in the basis shape key ("MessedUpBasis")
but for whatever reason these changes were not propagated
to the two dependent shape keys Brow.Up.L and Brow.Up.R.
The effect is that fully applying the first shape key
makes the chin go back to its original shape and even
worse applying also the second shape key makes it even
thinner.
For this example I just moved the
Chin.Wider shape key
from the left example to the top, making it the new basis and
deleted the old "
Basis" shape key. This is not what
happened in my actual model though. I don't know how this
happened there but it might well have been this bug:
Shape keys get
out of sync with Basis shape.
Before I show (one way) how to resolve this, a few things
should be briefly explained:
- One might think a (dependent) shape key (all but the
basis) defines relative transformations for all (affected)
vertices. However apparently this is not the case in
Blender. Instead each shape key contains absolute
positions for all vertices (see bug report above).
- Only when the effect of a shape key (if the value is not
0) is applied the relative transformations of each vertex
relative to the shape key defined under "Relative To"
(usually the basis shape key) are calculated.
- Now in the messed up example the wider chin was not
propagated to the two eye brow shape keys. Thus both shape
keys containing the original coordinates for the chin
vertices. So both shape keys "think" that they should make
the chin more narrow.
What we need to do now is:
- Recreate the original correct basis shape key (i.e. with
the normal original Suzanne's chin)
- Create a shape key containing our changes only (the
wider chin)
If we are lucky the first thing can be achieved by
combining different parts of two or more shape keys. in our
example we could use Brow.Up.L for the right side of
the face (or just everything except the parts deformed by
this shape key) and Brow.Up.R for the other half
(parts) of the face. In this special case we could also use
the MessedUpBasis for the right left eye region, as
only the chin contains deviations from the original basis.
This makes it a bit easier, so I'm going to explain this
now.
- Create a vertex group and name it e.g. Eye.L
Assign all vertices deformed by the Brow.Up.L
shape key (but not affected by our changes, i.e. the wider
chin).

- Important: Set all values for all shape keys to 0
- Make the Brow.Up.L shape key the new basis (temporarily)
- i.e. make it the first shape key.
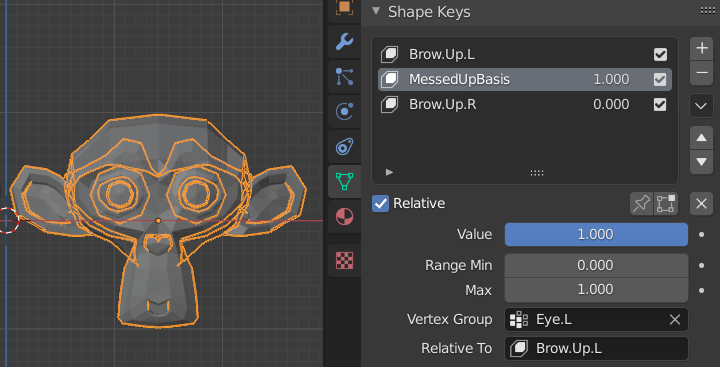
Make the MessedUpBasis shape key relative to the
new basis
Brow.Up.L, set the vertex group Eye.L such
that it will only manipulate the region where Brow.Up.L
contains changes to the original shape and set the value
of the MessedUpBasis to 1. Now you should see the
original basis (the original Suzanne in this case).
- Create a shape key from this by using "New Shape from
Mix" :
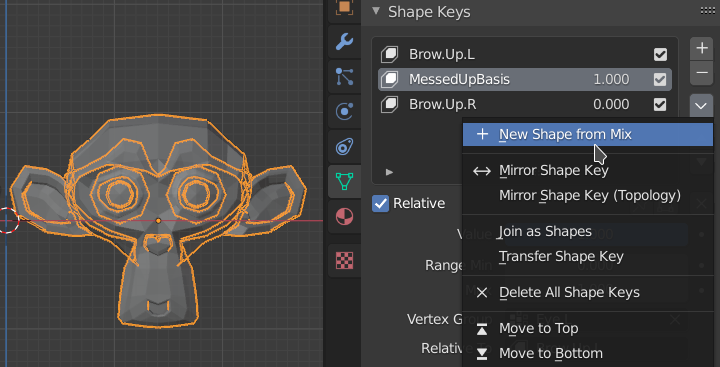
and call it "NewBasis" (or just "Basis") and
bring to the top.
- The final step to set this new basis shape key as the
basis for all other shape keys (incl. the old "MessedUpBasis")
and to remove the vertex group for "MessedUpBasis"
and preferably to rename "MessedUpBasis" e.g. to "MyChanges"
or in this case maybe to something like "Chin.Wider".
Note: Editing e.g. the "Relative To"
attribute of a mesh which also has physics enabled (Collider,
Force Field, Cloth Simulation, ...) can be extremely
slow, even if all physics are disabled. Remove them and
add them again afterwards. In my case it remembered all
physics settings.
Done!

Attention: Make sure to never edit the
new basis shape key again but to create new shape keys or to
use the MyChanges shape key.